bLanK's blog

攻无不克,战无不胜

  1. 确定声明值
  2. 层叠
    1. !important 的作者样式
    2. !important 的默认样式
    3. 作者样式
    4. 默认样式
  3. 继承
  4. 默认

相信很初学者在使用body-parser时感到疑惑

我们先说说他的作用,其实很简单,就是把HTTP请求里的请求体传参解析出来

我们在使用接口测试工具时(例如:postman Apipost)

ApiPost

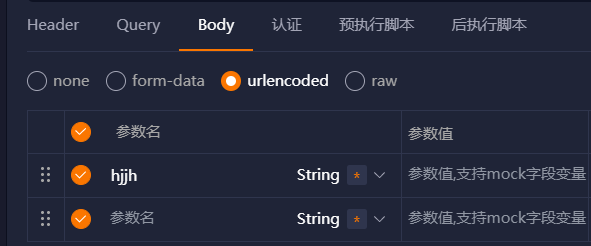
可以看到请求体传参有 content-type 分别是 multipart/form-dataapplication/x-www-form-urlencoded

multipart/form-data

  • 一般传送文件或者二进制数据,也可以传文本
  • 数据以多个part形式传输
  • 会指定一个boundary来分割不同part
1
2
3
4
5
6
7
8
9
10
Content-Type: multipart/form-data; boundary=
--------------------------460532464492192001772468
Content-Disposition: form-data; name="foo"

this is part 1.
--------------------------460532464492192001772468
Content-Disposition: form-data; name="baz"

this is part 2
--------------------------460532464492192001772468

application/x-www-form-urlencoded

  • 一般传输文本
  • 格式是key=value&key2=value2,其实和query参数一样,只是后者在请求头,前者在请求体里
  • 字符会经过URL编码
    1. 转成ASCII码
    2. 用16进制表示
    3. 每个字节前加%
    4. 如果字符不能转成ASCII码,则转成UTF-8编码,关于编码详见此处

      Eg: “中”在UTF-8编码中表示为0xE4B8AD –> %E4%B8%AD

raw

  • 一般传输图片、视频、音频
  • 表示原始未经处理的二进制数据,没有特定编码方式

body-parser

我们再说回body-parser

它支持解析urlencoded而不支持form-data

如果想要解析form-data可以使用busboy

1
2
3
4
5
6
7
8
/**
* @param {entries} Array 交叉状态数组
* @param {observer} Object 实例对象
*/
const observer = new IntersectionObserver(function(entries, observer){
console.log(entries)
console.log(observer)
}, options?)

options:

1
2
3
4
5
6
{
root: elementNode, //监听元素的祖先元素Element对象,其边界盒将被视作视口
rootMargin: "0px 0px 0px 0px", //计算交叉值时,边框相距rootMargin值也算交叉
threshold: 0.0 // 0~1 0表示碰到就算交叉,1表示全部进入才算交叉

}

实例方法

1. observe

observer.observe(elementNode)

2. takeRecords

observer.takeRecords()

3. disconnect

observer.disconnect() 取消监听

4. unobserve

observer.unobserve(elementNode) 取消对target的监听

MutationObserver 用于观察DOM的任何变动

但是DOM的变动是同步的,而此方法是异步微任务

构造函数

1
2
3
4
5
6
7
8
/**
* @param {MutationRecord} Array 变动数组
* @param {obInstance} Object observer实例
*/
const observer = new MutationObserver((MutationRecord, obInstance)=> {
console.log(MutationRecord)
console.log(obInstance)
})

实例方法

1. observe

1
2
3
4
5
/**
* @param {node} DOMnode dom节点
* @param {options} Object 配置对象
*/
observer.observe(node, options?)

options:

1
2
3
4
5
6
7
8
{
attributes: true, // 监控 属性变化
characterData: true, // 监听 声明的 target 节点上所有字符的变化
childList: true, // 监听 target 节点中发生的节点的新增、删除与修改, 包括innerText
subtree: true, // 监听 作用于该节点的整个子树
// attributeOldValue: true, //是否需要记录变动前的属性值
// characterDataOldValue: true //是否需要记录变动前的属性值
}

注意:

childList 所指的子节点包括 文本内容也是一个节点

2. disconnect

observer.disconnect()
停止监听

3. takeRecords

observer.takeRecords 用来清除变动记录,即不再处理未处理的变动。该方法返回变动记录的数组。

应用

1. 图片懒加载

2. 加载更多

插槽本质就是函数

父组件内通过<Child></Child> 方式是实例化子组件时如果使用了插槽,如下:

1
2
3
4
5
6
7
8
9
10
11
12
13
<!-- App.vue内 -->
<Child>
<p>默认插槽1</p>
<p>默认插槽2</p>

<template #namedSlot>
<p>具名插槽</p>
</template>

<template #scopeSlot="{ data }">
<p>{{ data }}</p>
</template>
</Child>

则插槽内容是一个对象,对象里面包含了 default namedSlot scopeSlot 这三个函数

1
2
3
4
<!-- Child.vue内 -->
<slot></slot>
<slot name="namedSlot"/>
<slot name="scopeSlot" :data="{abc: 123}"/>

<slot></slot>其实是调用那三个函数

scopeSlot( {data: {...}} ) 作用域插槽就是传了参数的函数而已

总结

  1. 父组件会把若干函数传递给子组件
  2. 子组件拿到函数并调用,返回VNode数组
  3. 子组件把VNode数组挂载到对应的<slot></slot>的位置
1
2
3
4
5
6
7
8
9
10
11
12
13
14
import {h} from 'vue'
export default {
setup(props, {slots}) {
//对象里有三个函数,函数名是插槽名,参数是作用域插槽的参数
const defaultVNodeList = slots.default && slots.default()
const namedVNodeList = slots.namedSlot && slots.namedSlot()
const scopeVNodeList = slots.scopeSlot && slots.scopeSlot({data: {name:'scopeSlot'}})


return () => {
return h('div',null,[...defaultVNodeList, ...namedVNodeList, ...scopeVNodeList])
}
}
}

模块种类

  1. 核心模块: path url file http
    • 优先级高,重名时优先加载
    • 直接导入模块名,不需要写路径 require('moduleName')
  2. 文件模块:
    • 引入可分为三种
      • 绝对路径 require('/moduleName')
      • 相对路径 require('./dir/moduleName')
      • 第三方加载方式 require('moduleName')
    • 如果不加拓展名,则按照 .js .json .node 顺序为其加上拓展名

加载机制

  1. 优先从缓存中加载
  2. 对于 require('moduleName') 方式导入先当作核心模块加载,如果没有则再当作第三方模块加载

第三方模块加载会一层一层的向外查找。

什么是函数柯里化

是把接受多个参数的函数变换成接受一个单一参数(最初函数的第一个参数)的函数,并且返回接受余下的参数而且返回结果的新函数的技术

实际应用

1
2
3
4
5
6
7
8
9
// 函数封装后
function check(reg, txt) {
return reg.test(txt)
}

// 即使是相同的正则表达式,也需要重新传递一次
console.log(check(/\d+/g, 'test1')); // true
console.log(check(/\d+/g, 'testtest')); // false
console.log(check(/[a-z]+/g, 'test')); // true

Currying后

1
2
3
4
5
6
7
8
9
10
11
12
13
14

function curryingCheck(reg) {
return function (txt) {
return reg.test(txt)
}
}

// 正则表达式通过闭包保存了起来
var hasNumber = curryingCheck(/\d+/g)
var hasLetter = curryingCheck(/[a-z]+/g)

console.log(hasNumber('test1')); // true
console.log(hasNumber('testtest')); // false
console.log(hasLetter('21212')); // false

经典面试题

1
2
3
4
5
6
7
写一个add函数 要求: 
add(1)(2) == 3
add(1)(2)(3) == 6;
add(1, 2)(3) == 6;
tip:
由add(1)(2)(3)可知 add(1)(2) 应该是返回函数的
但是又add(1)(2) == 3 ,可知 里面有隐式转换,重写toString()
1
2
3
4
5
6
7
8
9
10
11
12
13
14
15
16
17
18
19
function add() {
//空参数默认为0
//这个数组利用了闭包的特性,所有加数都会push进这个数组
const _args = arguments.length ? [...arguments] : [0];

function _adder() {
_args.push(...arguments || 0)
return _adder
}
//隐式转换时调用toString()
_adder.toString = function () {
return _args.reduce((a, b) => a + b)
}
//返回一个函数是一定的
return _adder
}
console.log(add(1, 2)(3, 4).toString());


webpack

webpack本身

  • 支持CommonJs语法
  • 只能编译js json,
    • js的es语法,这样可以让浏览器识别es语法,但是对于ES6老浏览器不支持,需要用babel转成ES5
阅读全文 »


title: vue插件-显示省略号内容
date: 2023-09-25 15:05:38
tags:

  1. 依赖element-ui/elementUI-plus
  2. 自定义指令:v-abbreviation
1
2
3
4
5
6
7
8
9
10
11
12
13
14
15
16
17
18
19
20
21
22
23
24
25
26
27
28
29
import ElementUI from "element-ui"
export default {
install(Vue) {
let mt = null; //弹框实例
Vue.directive('abbreviation', {
inserted(element, binding) {
const Popover1 = Vue.extend(ElementUI.Popover)

if (!mt) { //没有实例就创建
const vmtest = new Popover1()
mt = vmtest
mt.trigger = "hover"
mt.placement = 'bottom'
}
element.addEventListener('mouseover', function () {
console.log('listen hover', element);
if (element && element.scrollWidth > element.offsetWidth) {
mt.reference = element
mt.referenceElm = element
mt.content = element.innerText
mt.$mount()
document.body.appendChild(mt.$el)
}
})

}
})
}
}

现已发布到npm: npm i Vabbreviation 安装

{% if theme.CloudCalendar.enable %} {% endif %}